
If you buy through links on our site, we may earn an affiliate commission at no extra cost to you. Thanks for supporting our site!
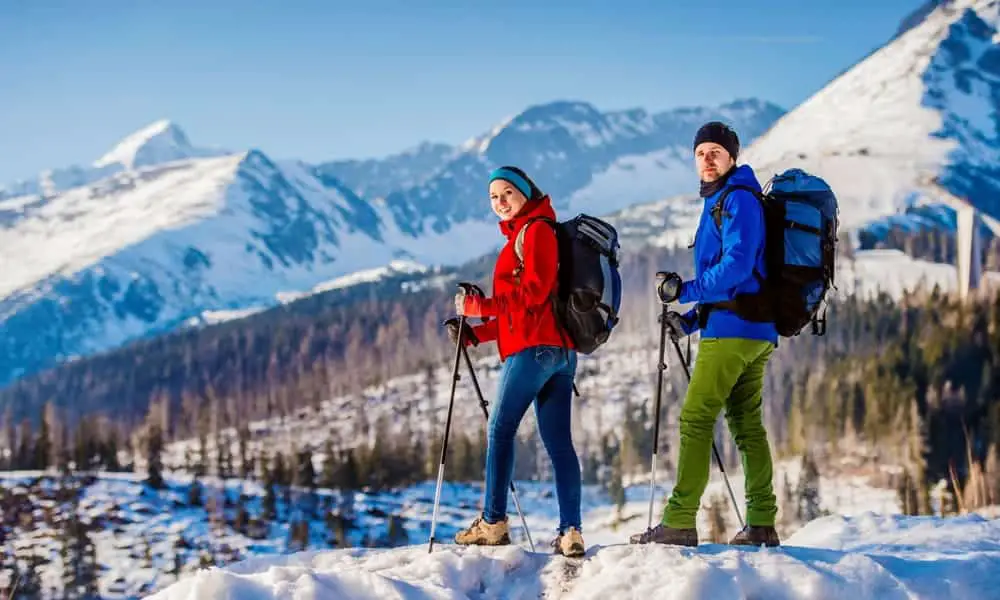
Whether you are going to be on long hikes with shifting elevation gain or you are nordic skiing through the backcountry, it’s always important to make sure you find your ideal and proper height for trekking poles. Other comfort features are important, such as a comfortable and non-chafing wrist strap, or lightweight carbon fiber poles with an ergonomic pole tip. None is more important than the right length on your hiking pole. Hiking pole height varies from person to person and is based on what sorts of routes you’re going to be exploring. You may be thinking you need a trekking pole height calculator to make sure the height is just enough to give proper support on your journey.
Thankfully, it’s easy to find what your ideal height is, even if you just compare it to your own body while you’re standing upright. Here we have all the information you need on how to adjust trekking pole length and how to properly calculate your trekking pole’s height so that you have the perfect support for your adventure and don’t need to constantly stop to readjust your poles over and over again.
What You Need
There are hardly any tools needed to fix up a trekking pole. While some might have clasps or screws that you have to loosen in order to adjust sizes, most have a simple clasp that you can open with your hands with a little strength. Many also have tension screws that hold the pole in place when restricted, but these usually don’t require any specialised tool and can just be turned with your hands.
Nonetheless, there can occasionally be exceptions depending on the product you’re using, so it’s important to make sure you keep the instructions to know how your pole’s height can be changed. Some like the affordable Bafx Hiking Poles have their extensions near the bottom with shock absorption that screw tight like a lightbulb, while others like the premium Leki Vario Carbon Trekking Pole have more traditional clasps and tension screws that can be tougher to adjust.
Step 1: Open Any Clasps And Loosen Any Tension Screws
The first step of adjusting any walking pole is to loosen any part of it that restrains its height while you’re walking. These tools are holding up a lot of weight and take a lot of pressure, so they often are incredibly tight when in use and when you first receive them. Much like any adjustable chair or tool, you’ll need to make sure anything tightening the pole is loose enough for you to easily slide its parts to resize it.
The most common way to find this is through the earlier-mentioned clasps and tension screws. Usually, there’s a long clasp that wraps around the pole that holds it in place, while the tension screw ensures that it stays restrained while putting heavy pressure on it while walking. You’ll usually need to loosen both before you can move the parts in the first place, and loosening as much as you can make it especially easy to shift.
Step 2: Calculate Trekking Pole Length Using Your Height And Elbow
Since you’ll be walking a lot with your poles, it should always be the perfect height for your body to make sure you’re comfortable and supported. There are two ways you can do this, with the first being the use of a trekking pole calculator. You can often do this without looking up a sizing chart, but an easy shorthand is that your hiking pole should usually be about 60% of your height, as that’s about where your hand should be resting on the pole’s handle to provide a comfortable grip and optimal support.
Essentially, you can calculate your trekking pole length by multiplying your own height by 0.6. For example, someone who’s about 180cm tall (or 6’0″) should have a trekking pole that’s about 108cm tall (or 3’7″).
Alternately, a much easier way to calculate your hiking pole’s height is to simply use your elbow as a guide, as the ideal way to hold a hiking pole is to have a solid 90-degree bend in your arm. Simply measure from your elbow to the ground, and you should be able to recognize what your hiking pole height should be without any calculators or charts. So long as you aim to keep an eye on your posture as you walk, this should be able to provide an ideal hiking pole length nearly every time.
Step 3: Adjust Height For Hills

There’s one additional reason you might want to change your walking pole length, and that would be for intense levels of elevation. These will cause you to bend your arms much more while using your hiking poles, and your standard height could be either too high or too low if you need additional grip and support on large hills. As a result, you’ll need to modify your height slightly if you want perfect posture or if you need to rely on your hiking poles for support more than the average hiker.
Broadly speaking, you should aim to adjust the height of your poles by about 5-10cm, or 2-4 inches, depending on the sharpness of your hill. If you’re going uphill, you’ll want to decrease your trekking pole height by this amount. You want a shorter pole as you’ll be raising your poles higher to match the hill. If you’re going downhill, you’ll want to increase your trekking pole height by this amount. You want a longer pole length to allow you to stay upright and not fall forward due to a lack of support.
Step 4: Tighten Any Tension Screws and Close Your Clasps
Once you’ve found your ideal height, you can simply adjust whatever parts need to be moved in order to increase the height. You can do this on a flat surface with measuring tape if you wish to adjust it based on your numerical height, but if you’d rather adjust it by your elbow, you can simply lift it while loosened and let it fall to the ground, and hold the pieces in place while you move to retighten the pole.
To do this, you should ideally need to follow the reverse of any steps you took to loosen the pole in the first place. Once you’ve tightened any tension screws, close the clasp wrapping around the pole or twist any screwable parts back to make sure it’s nice and tight. Once again, you’ll be putting a lot of pressure on these poles if you’re hiking for long periods or need additional support, so make sure you have them as tight as possible without feeling like they’ll crack from the pressure.
Conclusion
As mentioned earlier, there can be exceptions based on your products, but the products themselves may often come with guides or numerical advice. Poles like the Black Diamond Trail Trek Poles will have height indicators below the clasps to help you consider height, while others like the Trekology Trek-Z Collapsible Hiking Poles will have additional studs and screws to apply firmly. Your trekking pole can vary massively, so always read the instructions when purchasing a new pole.
Whatever product or brand you go with, your trekking pole should feel like an extension of your body, giving you ample support to keep a strong vertical posture on any terrain. People use these poles for anything from challenging routes to physical support, but whatever your needs, it’s important to always make sure it’s at a height that’s comfortable and supportive.
STANDARD FORMULA: Your Height * 0.6 = Trekking Pole Height
UPHILL: Subtract 5-10cm from your trekking pole height.
DOWNHILL: Add an additional 5-10cm to your trekking pole height.


[…] of carrying double trekking poles are mainly related to convenience. If you’re holding two trekking poles, then you have no more free hands for anything else! Many hikers prefer having a free hand, which […]