Backpacking with a tarp has become increasingly popular among outdoor enthusiasts seeking a lightweight, minimalist, and adaptable shelter option. Tarps offer the opportunity to experience nature more closely, as they provide a direct connection to the surroundings without the barriers of a tent.
As more hikers and campers turn towards tarp shelters, there are various methods and considerations to keep in mind when choosing and setting up a tarp for a backpacking excursion.
Tarps come in different sizes, shapes, and materials, with backpacking tarps typically falling in the 9′ x 9′ range and weighing around one pound.

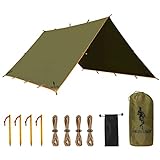
- Protection: Rain or shine, our heavy-duty camping tarp provides reliable foul-weather protection to keep campers happy and dry, whether you are relaxing on a camping hammock or in a camping tent.
- Quality: Built to last, our camping tarps are made with ripstop waterproof nylon, taped seams, and an impenetrable water barrier for cover against all conditions; the hammock tarp comes with reinforced stitching, along with leakproof tapered seams with a PU rating of 3000 mm water pressure
- Easy Setup: Equipped with aluminum tent stakes and six 10" guy lines cords that tighten at every corner, our hammock tarp makes setting up a breeze
- Portable: Packed in a convenient waterproof carrying bag, our rain tarp can be taken anywhere - from backpacking to boating. Our Hammock Tarp is 11 ft long by 9 ft wide and 26 oz (our Lite version weighs only 18.9 oz!), the perfect size to cover your camping hammock
- Camping Gifts: No matter the occasion, our lightweight tarp tents are must-have camping and tent accessories for the adventurer in your life.
Thus, they can significantly reduce pack weight when compared to traditional tents. When selecting a tarp for backpacking, it’s essential to consider the weather conditions and environment to ensure adequate protection and comfort.
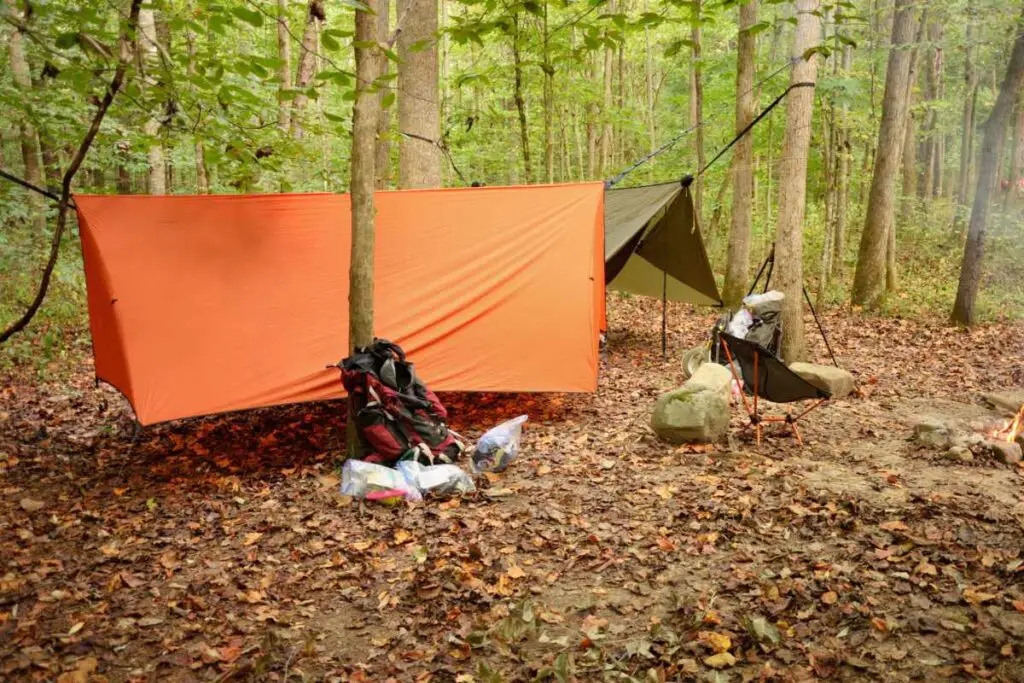
There are multiple ways to set up a tarp shelter, depending on the situation. For example, the A-frame method offers good ventilation and quick setup for fair weather conditions. A lean-to pitch provides better protection from wind, while a diamond pitch minimizes exposure during heavy rain.
Learning these different setups and knowing when to use each can greatly enhance the overall tarp camping experience for backpackers.
Why Choose a Backpacking Tarp
Ultralight and Compact
Tarps are a popular choice among backpackers, particularly those who are focused on minimizing weight and maximizing the efficiency of their gear.
In comparison to traditional tents, tarps provide an ultralight option, often weighing a fraction of the pounds and ounces carried by tent users.
The compact nature of a tarp also makes it an ideal component of a backpacker’s gear, taking up minimal space and allowing for a lighter overall load.
Versatility
One of the key benefits of choosing a backpacking tarp is the versatility it offers. A tarp can be easily adapted for various weather conditions and terrain, providing a range of shelter configurations.
For instance, tarps can be pitched in a way that provides effective ventilation in hot, humid environments, while also allowing for protection from the elements during wet or windy conditions.
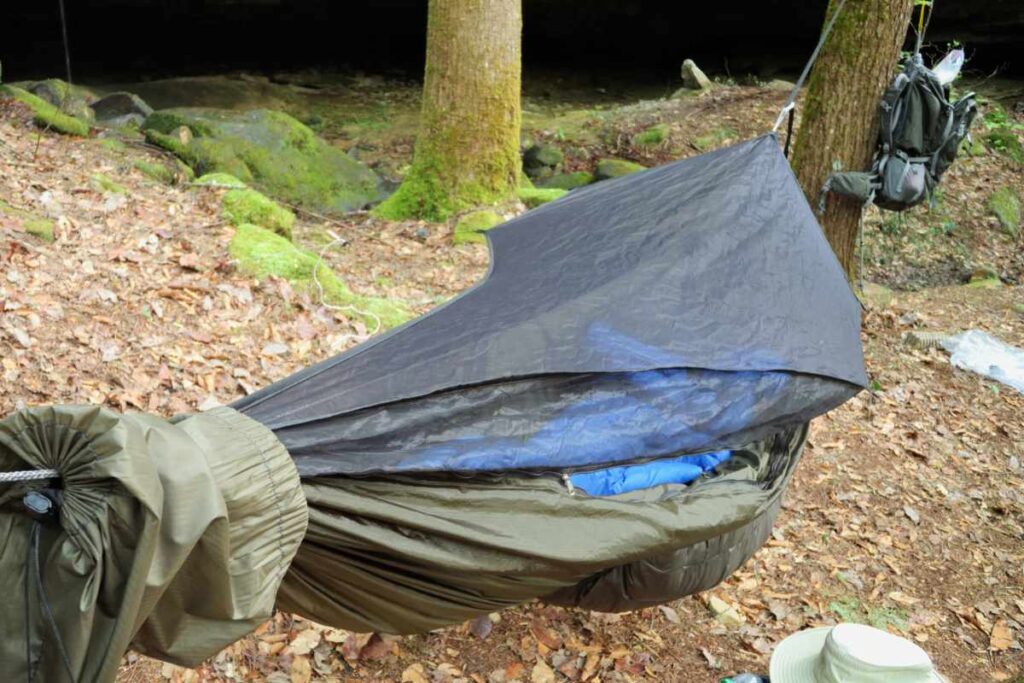
Moreover, they can be used as a standalone shelter or can be paired with a hammock for a comfortable and elevated sleeping solution, popular with minimalist backpackers and thru-hikers alike.
Affordability
Another reason why backpackers often choose tarps for their lightweight shelter needs is the affordability factor. Tarps tend to cost less than traditional tents, making them an attractive option for budget-conscious adventurers.
This can be particularly advantageous for those just starting out with backpacking, as it allows beginners to explore the world of ultralight gear without having to make a significant financial commitment.
Customizability
For those who appreciate the ability to tailor their gear to their specific preferences, tarps deliver plenty of customization possibilities.
With the freedom to pitch a tarp in a variety of ways, depending on personal needs and environmental factors, backpackers can truly make their shelter their own.
Additionally, for those with a creative or DIY inclination, tarps offer the opportunity to craft a truly unique and personalized shelter solution, something that is not as easily achieved with traditional tents.
Types of Backpacking Tarps
Flat Tarps
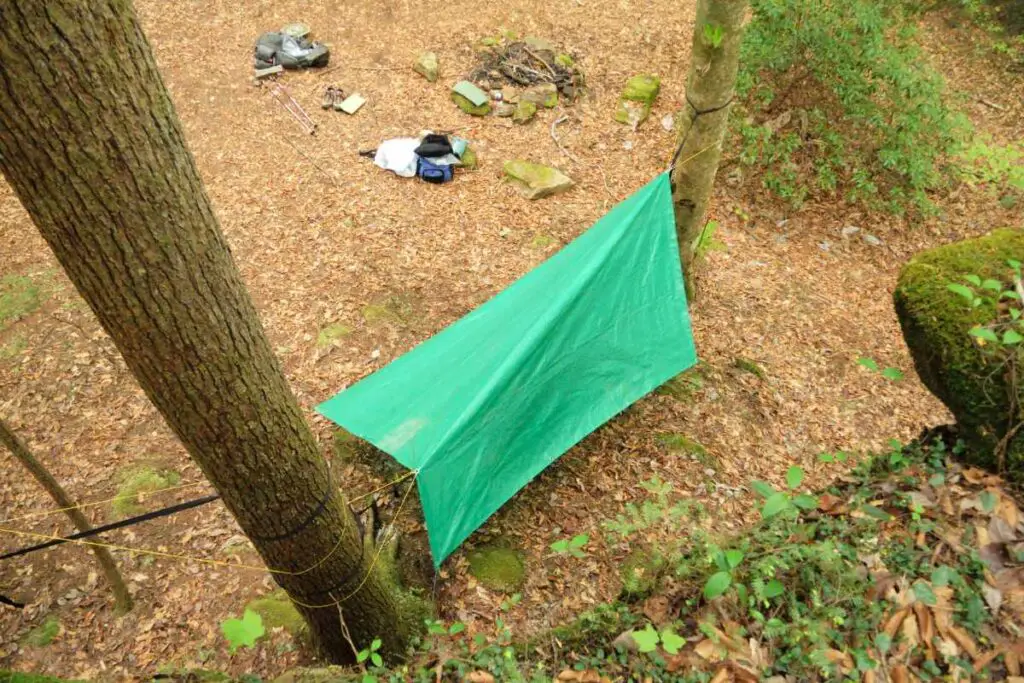
Flat tarps are the most basic and versatile category of backpacking tarps. They are typically square or rectangular in shape and can be set up in various configurations depending on the weather and desired level of protection.
These tarps are commonly made from lightweight materials such as nylon or polyester. They come in various sizes, with popular options being 8’6″ x 8’6″ and 8′ x 10′. Flat tarps are known for their simplicity and adaptability, making them a popular choice among backpackers.
Diamond Tarps
Diamond tarps, often referred to as asymmetrical tarps, are another popular option for backpackers seeking lightweight and compact shelter. These tarps are designed with a single diagonal fold, creating a diamond shape when pitched.
Diamond tarps provide increased coverage for hammock setups while sacrificing some floor space compared to flat tarps. Like flat tarps, they are commonly made from lightweight materials such as nylon or polyester.
A-Frame Tarps
A-Frame tarps are a popular tarp configuration, often used in conjunction with flat tarps. A-Frame tarps are pitched by suspending the tarp over a ridgeline or trekking poles, creating an A-shaped structure.
This structure provides good weather protection and ventilation, making it a popular choice for backpackers. The A-Frame setup can be achieved using various tarp shapes, such as flat tarps, diamond tarps, and even shaped tarps that have specific design features in mind.
Each type of backpacking tarp comes with its own set of advantages and limitations. Backpackers must consider factors such as shape, material, size, and desired level of protection when choosing the right tarp for their needs. Ultimately, personal preference and experience will guide the decision-making process.
Tarp Shelter Configurations
When backpacking with a tarp, there are several shelter configurations to choose from depending on your needs and the environment you’re in.
This section will discuss four common tarp shelter configurations:
- A-Frame
- Lean-To
- Diamond
- and C-Fly
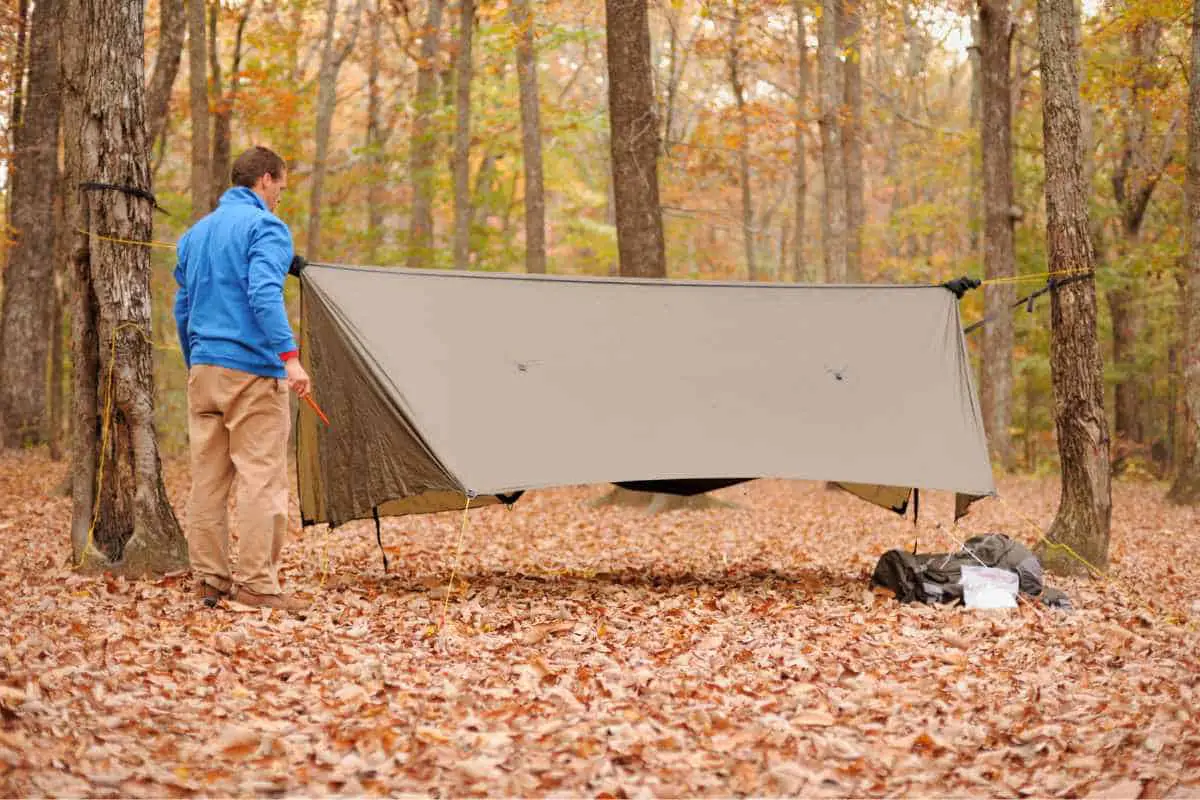
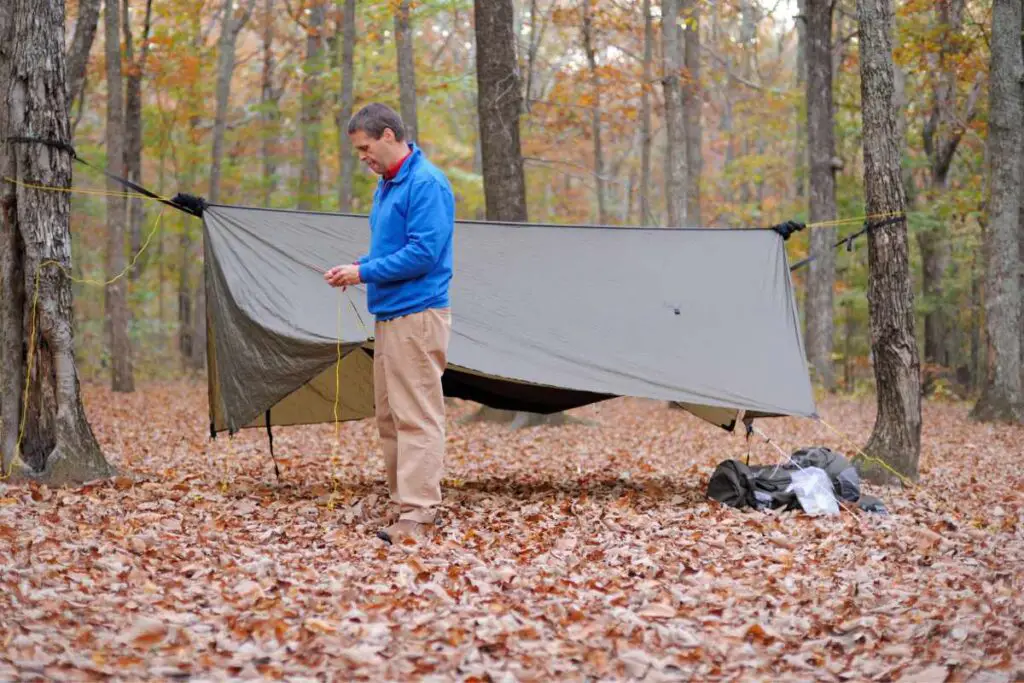
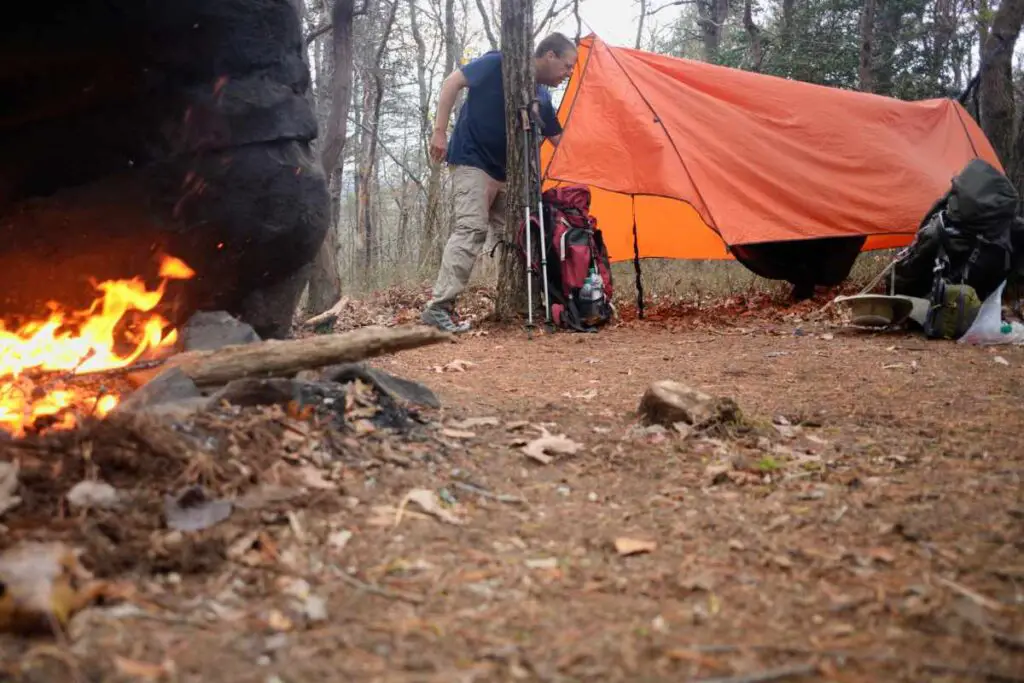
A-Frame
The A-Frame configuration is a classic and versatile shelter setup.
To create an A-Frame tarp shelter, follow these steps:
- Find a suitable location, ideally between two trees.
- Attach a ridgeline using cord or guyline between the two trees at a height of approximately 3-4 feet.
- Center the tarp over the ridgeline and secure the edges of the tarp to the ground using stakes on both sides.
- Adjust the frame and tighten the guylines to ensure stability and proper tension.
The A-Frame provides good protection from wind and rain, making it a popular choice for various weather conditions.
Lean-To
The Lean-To configuration offers a quick and simple shelter setup.
To construct a Lean-To tarp shelter, follow these steps:
- Find a suitable location, ideally beside a tree or other vertical support.
- Attach one edge of the tarp to the support using cord or guyline.
- Pull the opposite edge of the tarp tight and secure it to the ground with stakes, angling the shelter away from the wind.
- Attach additional guylines to the sides of the tarp, securing them to the ground with stakes to provide extra stability.
The Lean-To offers basic protection from wind and rain, making it suitable for situations where you need a quick, temporary shelter.
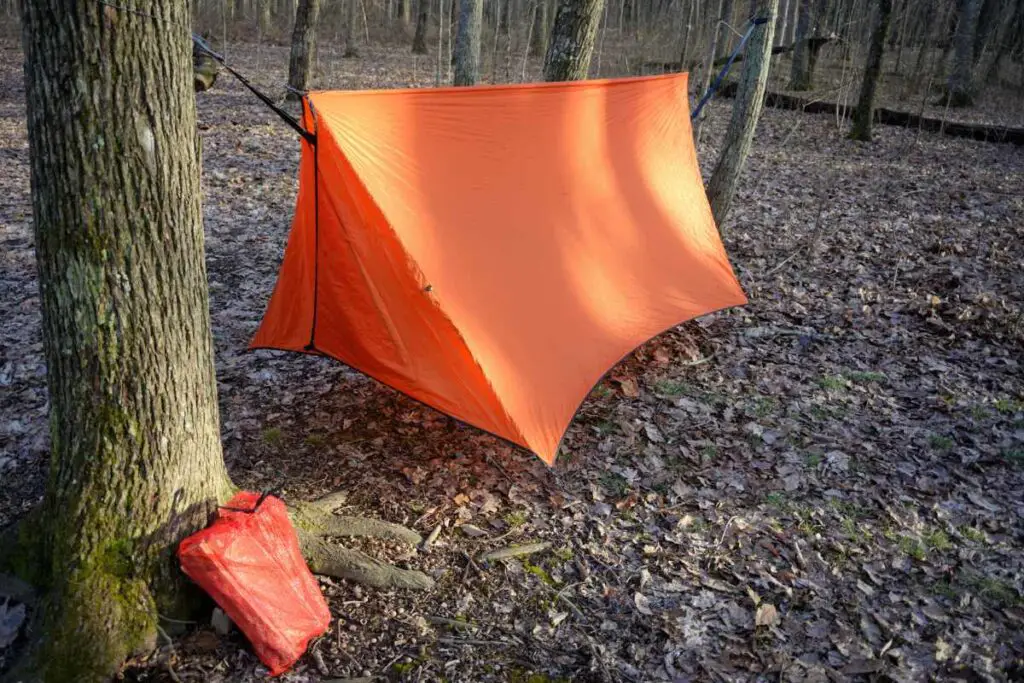
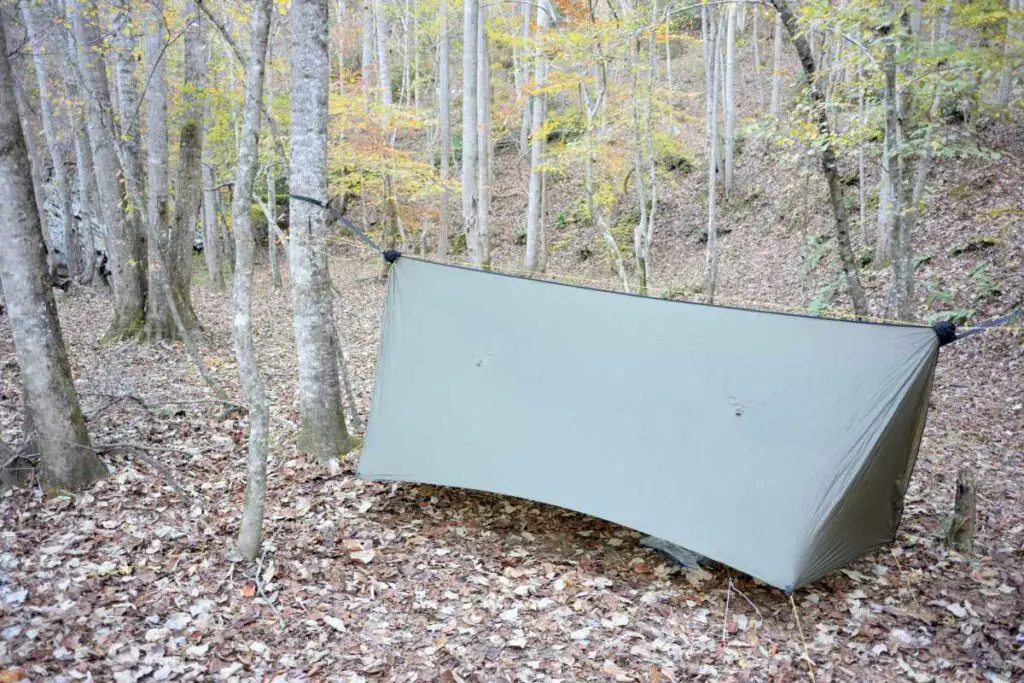
Diamond
The Diamond configuration provides a minimalist setup ideal for solo backpackers or those looking to save space and weight.
To set up a Diamond tarp shelter, follow these steps:
- Find a suitable location, ideally between two trees.
- Attach a ridgeline using cord or guyline between the two trees at a height of approximately 4-5 feet.
- Secure one corner of the tarp to the ridgeline, then pull the opposite corner tight and secure it to the ground with a stake.
- Attach guylines to the remaining two corners, pulling them tight and securing them to the ground with stakes.
The Diamond setup offers moderate protection from wind and rain while being lightweight and compact, making it an excellent option for minimalists.
C-Fly
The C-Fly configuration is a modern take on the classic Lean-To setup, offering improved protection and adaptability.
To create a C-Fly tarp shelter, follow these steps:
- Find a suitable location, ideally between two trees.
- Attach a ridgeline using cord or guyline between the two trees at a height of approximately 4-5 feet.
- Center the tarp over the ridgeline and secure the edges to the ground on one side with stakes, forming a C-shape.
- Attach guylines to the corners and sides of the tarp, securing them to the ground with stakes for added stability and tension.
The C-Fly configuration provides more protection from wind and rain than the classic Lean-To and is a great option for those seeking a versatile, adaptable shelter.
Essential Tarp Setup Skills
Knot Tying
Mastering some essential knots is crucial for setting up a tarp shelter effectively.
Three common knots that come in handy while setting up a tarp shelter include:
- Bowline Knot: This knot forms a secure, non-slip loop at the end of a rope, which can be used to attach guylines to the tarp or to create anchor points.
- Trucker’s Hitch Knot: This knot allows you to create tension in a rope or guyline. It is useful for tightening guylines to achieve the desired tarp shelter shape and stability.
- Taut-Line Hitch Knot: This adjustable knot is used to maintain tension on a guyline while keeping the tarp shelter in place.
Guyline Tensioning
For a stable tarp shelter, proper tensioning of guylines is essential.
To ensure that your shelter holds up well to wind and weather, follow these steps:
- Begin by attaching guylines to the tarp using bowline knots or the knots provided by your tarp manufacturer.
- Use a trucker’s hitch knot or other suitable methods to secure the guylines to their respective anchor points or stakes.
- Adjust the tension of the guylines by using the taut-line hitch knot. This knot allows you to change the tension without having to untie and re-tie the guyline.
Staking Out
Properly staking out your tarp is crucial for maintaining the desired shape and stability of your shelter.
Here are some helpful recommendations:
- Stake Selection: Opt for lightweight aluminum or titanium stakes for backpacking as they provide excellent strength-to-weight ratio.
- Stake Placement: Drive stakes into the ground at a roughly 45-degree angle away from the tarp, which ensures maximum holding power.
- Adjusting Stake Position: If your tarp shelter is not holding up well to prevailing winds or other weather conditions, you may need to adjust your stake positions to better anchor your shelter.
By honing your knot-tying skills, mastering guyline tensioning, and properly staking out your tarp, you’ll have the essential skills needed for setting up a secure tarp shelter during your backpacking adventures.
Weather Protection and Site Selection
Choosing a Good Campsite
When backpacking with a tarp, it’s essential to select a good campsite that offers natural protection from the elements.
Here are some key factors to consider:
- Higher ground: Opt for higher, drier ground to reduce moisture and condensation.
- Tree cover: Look for sites under trees, which provide a warmer and more protected microclimate.
Setting Up for Rain and Wind Protection
Proper setup is crucial for protecting yourself from rain and wind when using a tarp.
Here are some steps to follow:
- Stake down one side of the tarp: Secure one side of the tarp to the ground to serve as a windbreak.
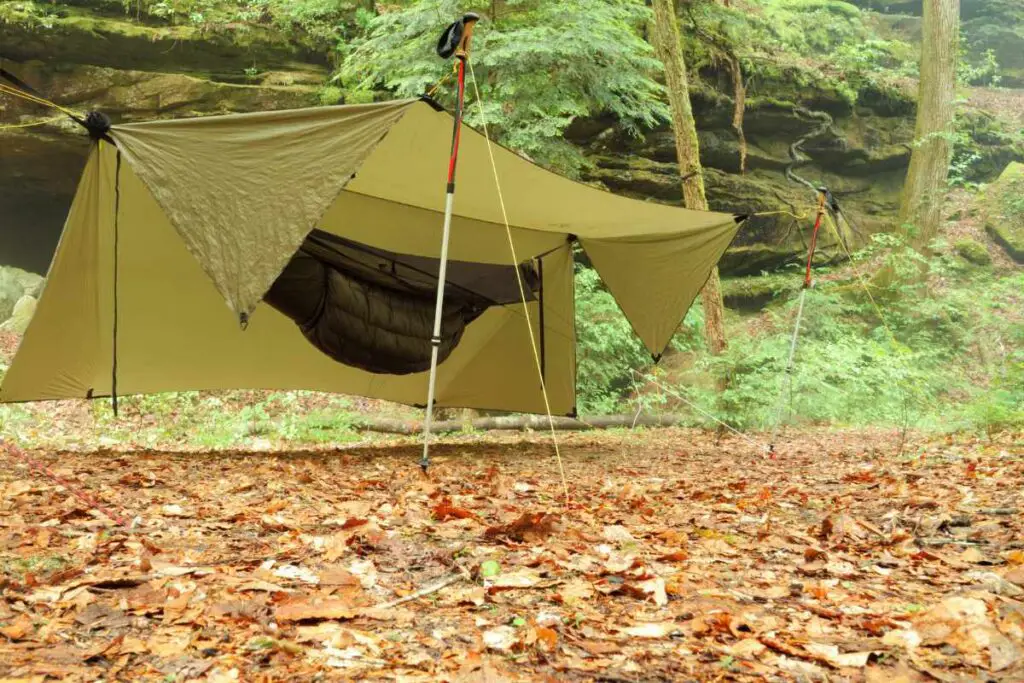
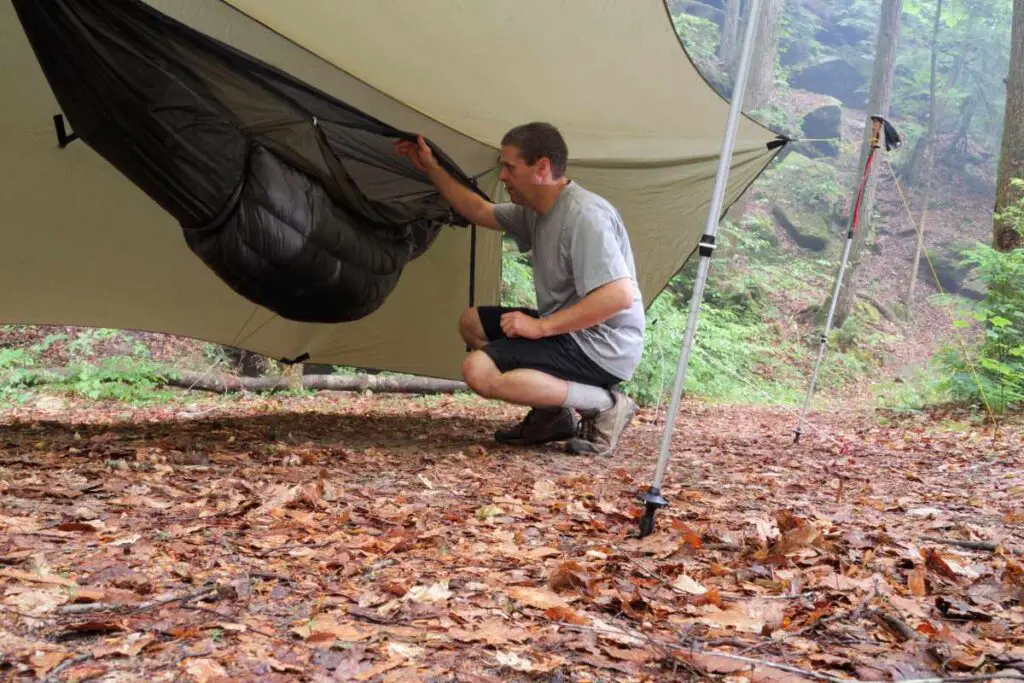
- Set up trekking poles: Place one trekking pole in the middle of an adjacent side of the tarp, angled slightly, and tension the pole’s guyline (at about a 90° angle from the tarp). Repeat with the other trekking pole, angled slightly toward the front of the tarp.
- Adjust guylines and stakes: Depending on the weather, tighten or loosen guylines and stake positions to ensure stability and sufficient coverage.
Snow and Alpine Conditions
In addition to the tips mentioned above, take extra precautions when backpacking with a tarp in snow and alpine conditions, such as:
- Additional tie-downs: Use ropes to secure the tarp to nearby trees or rock features for added stability.
- Snow stakes: Opt for specialized snow stakes designed for use in snowy conditions to secure the tarp more effectively.
- Insulation: Don’t forget to pack and layer proper insulation beneath and inside your sleeping system to stay warm in colder environments.
By paying attention to site selection and proper tarp setup, you’ll be well-prepared to face various weather conditions while backpacking with a tarp.
Additional Gear and Accessories
Groundsheets and Bivy Sacks
Groundsheets and bivy sacks are essential when backpacking with a tarp, as they provide protection and insulation from the ground.
Groundsheets are usually made of lightweight and durable materials like silnylon, Tyvek, or polycryo. They prevent moisture from seeping into your sleeping bag or quilt, helping to keep you dry and warm.
Bivy sacks, on the other hand, are breathable, waterproof covers that can serve as an additional layer of protection for your sleep system. They are excellent for use with minimal tarp shelters to provide more insulation and runoff resistance.
Trekking Poles and Ridgeline Supports
Trekking poles and ridgeline supports are crucial components for setting up your tarp shelter. They help to maintain tension and proper pitch while giving your tarp the necessary headroom.
Some popular options for ridgeline supports include:
- Trekking poles: These multi-purpose poles can be used for hiking support and as tent poles for your tarp shelter. Adjust the height of the poles to create different pitches, depending on the weather and terrain.
- Cordage: Paracord or other lightweight, strong cords can be used to create a ridgeline between two trees or other anchor points. This creates a secure foundation for the tarp and helps maintain proper tension.
Bug Nets and Mesh Enclosures
Bug nets and mesh enclosures are valuable additions to your tarp camping setup, especially in areas where insects are prevalent.
They provide extra protection against mosquitoes, flies, and other pests while still allowing for ventilation and breathability.
Some popular bug net and mesh enclosure options include:
- DIY bug nets: Use lightweight, breathable mesh material to create a custom bug net that fits your tarp and sleep system.
- Sea to Summit Escapist: This ultralight, modular bug net system can be used with tarps, tents, or hammock tarps and offers full enclosure to keep insects at bay.
- MSR Thru-Hiker: The MSR Thru-Hiker bug net offers on-the-go protection for up to three people while tarp camping. It is easy to set up and includes stakes for stability and tension.
When choosing your additional gear and accessories, always consider weight, packability, and versatility.
Proper stakes, cordage, and other items will ensure a secure setup while keeping the overall pack weight low, making your backpacking trip more enjoyable and comfortable.
Tips and Tricks for Tarp Camping Success
Proper Ventilation Management
One of the features that make tarp camping appealing to hikers is its open and airy nature. However, proper ventilation management is essential for a comfortable experience.
To ensure maximum airflow under the tarp shelter, set it up between two trees, at least 5-7 feet off the ground and 10-20 feet apart. When pitched correctly, this should help avoid condensation and keep bugs at bay.
Remember that the tarp should be flat to provide enough space for the hiker while still ensuring ventilation.
Cooking and Eating Under a Tarp Shelter
Cooking and eating under a tarp shelter can be a comfortable experience if done correctly.
Here are some tips to make it a success:
- Set up a designated cooking area within the shelter, away from sleeping areas, to prevent accidents.
- Use a small, compact cooking stove that can be easily moved or adjusted as needed.
- Keep food and cookware organized in separate containers, and always clean up after each meal to avoid attracting bugs or wildlife.
- Ensure proper ventilation while cooking by pitching the tarp higher or angling it to allow for fresh air circulation.
Adapting to Changing Weather Conditions
Tarp camping requires hikers to be versatile and prepared for changing weather conditions. One of the key benefits of a tarp shelter is its adaptability to various shapes and configurations.
When facing adverse weather situations such as rain or sun exposure, here’s how to adapt your tarp setup:
- In the case of rain, adjust the pitch of the tarp to a more steep angle to allow water runoff and prevent pooling.
- For sun protection, pitch the tarp lower on the side facing the sun, creating shade to prevent overheating.
- In windy conditions, pitching the tarp closer to the ground or using a proper windbreak will help maintain a comfortable environment.
By applying these tips and tricks, hikers can enjoy a successful and enjoyable tarp camping experience that is versatile, comfortable, and adaptable to various situations, allowing them to fully embrace the outdoors without feeling claustrophobic in a traditional tent.
Frequently Asked Questions
How to set up tarp shelter?
To set up a tarp shelter for backpacking, first, lay out the tarp on the ground and stake out the corners. Attach guylines to the tarp’s attachment points and use tensioners or knot knowledge to secure them. You can use trekking poles, tree branches, or other sturdy objects to create a ridgeline, and adjust the positioning of the guylines and stakes to achieve the desired tarp configuration.
Best tarp configuration for rain?
A good tarp configuration for rain protection is the A-frame setup. In this configuration, a ridgeline is created down the center of the tarp, forming an “A” shape with two steeply sloping sides that touch the ground. This design allows water to run off the tarp sides and away from the sheltered area underneath.
Ideal tarp size for backpacking?
An ideal tarp size for backpacking is in the range of 9′ x 9′, as it is lightweight (around one pound or slightly more) and provides adequate coverage for one person or a cozy shelter for two. The dimensions can vary depending on your needs and weather conditions, so choose a tarp size that suits your personal preferences.
Trekking pole tarp set up?
To set up a tarp shelter using trekking poles, first, stake out the four corners of the tarp. Then, adjust your trekking poles to the desired height and place the tips of the poles in the grommets or attachment points along the center of the tarp. Tie guylines to the poles and stake them out in a way that creates tension, thereby supporting the tarp. Adjust guylines as needed to achieve the desired configuration.
Tarp vs Tent for backpacking?
Tarps offer the advantages of being lightweight, versatile, and adaptable, making them an excellent shelter option for ultralight backpacking or in areas with less rain. Tents, on the other hand, offer superior protection from the elements and bugs, as well as more privacy. Ultimately, the choice between a tarp and a tent depends on factors such as weight, weather conditions, personal preferences, and the specific circumstances of your backpacking trip.
Ground tarp for backpacking?
A ground tarp, also known as a groundsheet or footprint, is a waterproof barrier placed between the ground and your sleeping area to protect you from dampness and dirt. Ground tarps also help prolong the life of your sleeping pad or shelter by providing a barrier against abrasion. When using a tarp as a shelter, consider using a lightweight ground tarp to maximize the protection and comfort of your sleeping area.
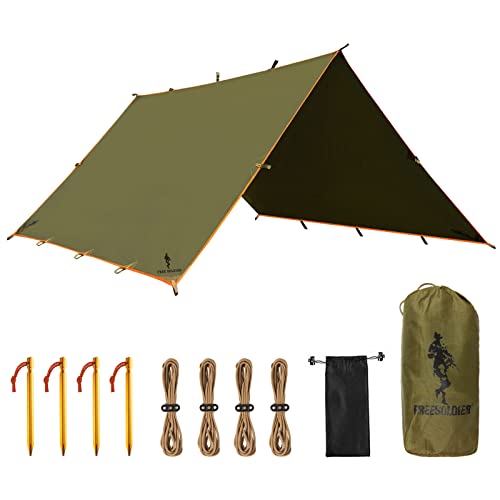
- WATERPROOF&UV PROTECTION:Hammock Camping Tarp made of 150D ripstop polyester fabric with 3000 PU waterproof rating,enhanced the shelter's waterproof function and offers long-lasting protection,strengthen tear resistant&puncture resistant material without any worries.FREE SOLDIER Backpacking Tarp also can be put up as awning is effectively for blocking ultraviolet ray and protect your skin from the sun
- STRONG&STABLE:This Camping Awnings using heat sealing and melting process,well combined with the puncture-resistant fabric,water penetration would never happened.Reinforced ridgeline seam,well prevent the connector from falling off,showing a better protection performance for continuous stormy weather, reliable, durable and safe
- HEAVY DUTY&PORTABLE:Large size in 118" × 126" when expended,enough for 2 persons.It's convenient to folded and put into a lightweight stuff sack when not in use,essential tarp gear for your outdoor travel.Net weight:1.2kg(42oz),not super light but heavy duty
- ACCESSORIES&SIMPLE TO OPERATE:Comes with everything of survival backpacking items:1 hammock rain fly,4 nylon guy lines with tensioners and 1 stuff sack.Rectangle shelter with 19 guy points and 5 strengthen grommet points which gives you the most coverage.Easy to set up into ground sheet and hammock shelter to avoid wind and rain
- MULTI-OCCASIONS:FREE SOLDIER Waterproof Portable Tarp apply to heavy duty operating, tactical, military, shelter, hunting, fishing, backpacking, traveling, hiking, working, camping and other outdoor adventure etc.Your satisfaction and happy is our pursuit