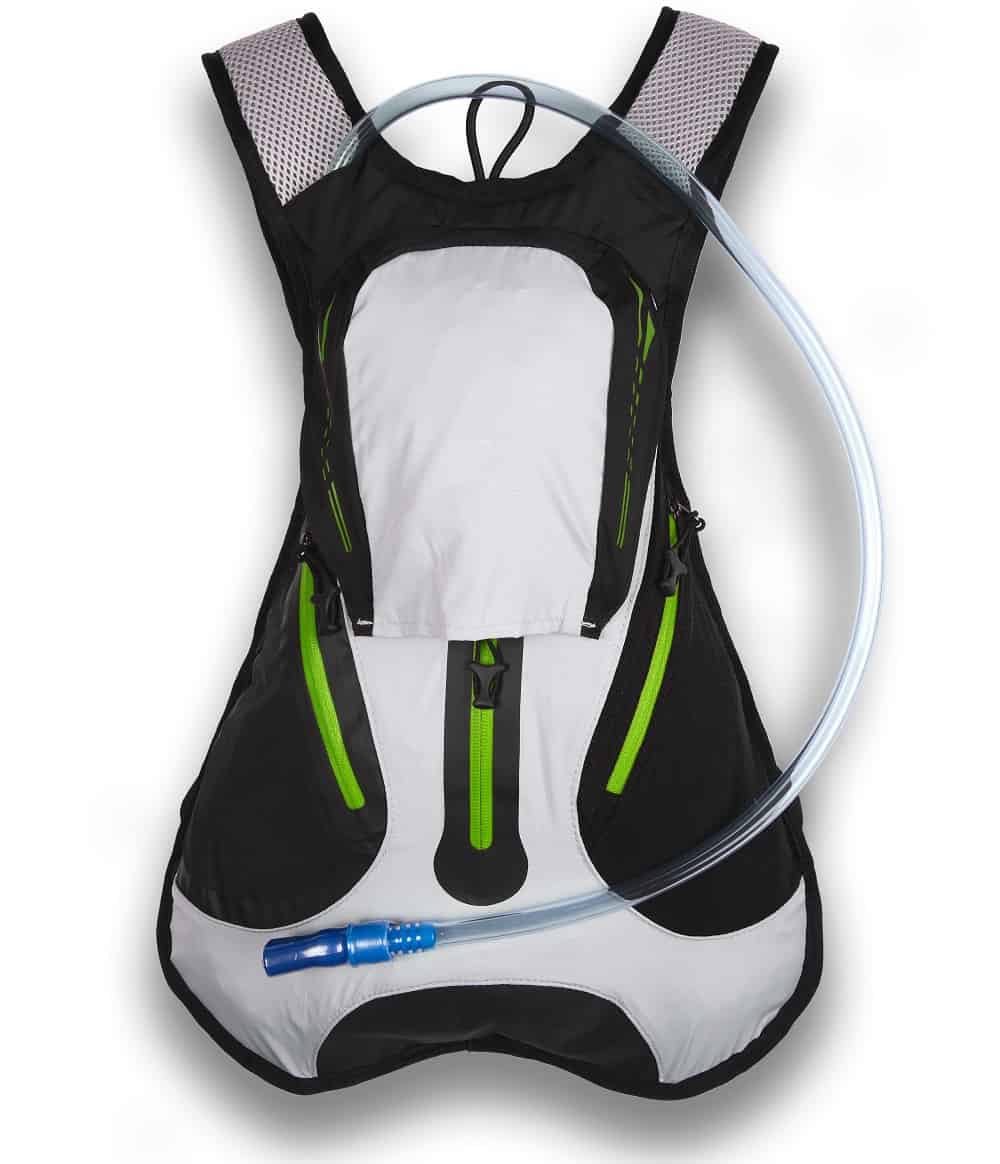
If you’re someone who uses a water bladder for hiking, cycling, or any other sort of sporting activity, you know how convenient and easy to use they are especially when you’re exhausted.
Being able to carry water easily on your back where the weight is easily spread out is highly convenient, however, there’s something a lot of people don’t know about water bladders, and it that they actually need quite a lot of maintenance to make sure they keep your water clean and safe for drinking.
You may be wondering why something that’s filled with clean water needs to be cleaned at all, and you wouldn’t be alone.
After all, tap water is relatively clean, and all we do is drink the water and refill it. How can any bacteria enter the picture, let alone ruin a perfectly good water bladder?
Well, the simple answer is that water always carries some bacteria, and it makes the perfect breeding ground for bacteria to multiply.
The result of this can be that your water bladder starts to smell bad, become discolored, or even start to make your water taste bad which is the last thing you need while doing anything strenuous.
To avoid this, proper cleaning and maintenance are critical, and in this article, we’re going to show you how to clean your water bladder correctly to make sure it continues to keep you hydrated for longer.
Rundown
To clean your water bladder there are a few things you’ll need to make the process as easy as possible as some of the shapes and the materials can make cleaning a little awkward and inefficient.
- Gather your cleaning supplies, brushes, and drying aids
- Mix some hot water and cleaner
- Fill up the system with this mixture
- Soak the system and drain out the cleaner, then scrub with brushes and rinse one final time.
- Dry off the worst of the water then let it air dry completely before using it again.
What you need:
Cleaning solution
There are various things you can use to clean your water bladder. Some of them include;
Reservoir Cleaning Tablets are specially designed and made and can simply be dropped into the bladder with some water and allowed to do their thing.
Baking Soda is a great all-rounder for cleaning and is also useful to get rid of nasty odors lingering in your equipment.
Make sure to measure out an appropriate amount for the size of your bladder, no more than a ¼ cup per liter of volume for most brands.
Bleach – Household bleach is a strong option that totally kills bacteria and viruses, and just a few drops need to be used in water to achieve the desired effect, but thorough rinsing is essential here, and some brands may not recommend bleach due to its harsh and corrosive nature.
Lemon Juice – This can be used to create a fresh scent in your bladder.
Cleaning tools
Cleaning brushes are essential to get into the awkward areas of the bladder, particularly the mouthpiece and tubes.
Scrubbing pads and brushes are a great way to scrub grime and filth off the inside and outside of the bladder.
Drying Aids
The key here is to keep the bladder open while it dries, making sure air can get to all the crevices within. This will help prevent bad smells from building up in the bladder again.
Hangers make a good choice for this and will allow your bladder to drip and air dry effectively and can use gravity to force water out of the tubes quite well.
Clothespins and clothes hangers are also very handy for this.
Paper towels are your friend as they don’t just move water around, but actually absorb it, preventing the water from staying inside your bladder and going stale and stinky!
How to Clean
- To clean your bladder you first want to fill it with warm water and add your cleaning solution. Seal the bladder and shake it to agitate the cleaning solution and get it to start actively working on killing bacteria.
- Lift up the reservoir and drain the solution into the sink to get the solution flowing through the tubes and mouthpiece which will help clean them very quickly and efficiently.
- Leave plenty of solution in the system so that it’s still quite full and set it aside to allow the cleaning solution to finish doing its work.
- You can now wash the bladder with normal dish soap and rinse thoroughly. Simply drain the cleaning solution entirely then fill with some water and a little dish soap.
- Scrub the interior of the bladder with a brush or pad.
- Rinse thoroughly with water and drain the tubes too to purge them of any soap or cleaning fluid.
- You can now allow your bladder to dry as mentioned.
- First, disassemble it as much as you can.
- Take some paper towels and remove as much excess water as you can without getting bits of paper towel inside the bladder itself which can get stuck inside!
- Hang the parts up or prop them upright using a wooden spoon for example.
- Allow to air dry completely until it is totally dry, ideally outside or indoors with an open window to allow as much air to circulate through the bladder as possible.